
Photos tell a story, show off our beautiful campuses and show our various audiences what it’s like to be a part of the campus community. At CMU, we recently launched a new Web design. Because real estate on the homepage is so valuable, we decided to shorten the height available for the main picture to 275 pixels. This presents a few problems. While it helps make space on the homepage, it can be difficult to find photography to fit the space. Bring on the panorama!
Panoramas can be created easily using Photoshop, and can be a great addition to your normal photo rotation. The following tutorial was built using CS5.
Step 1:
Find at least three photos you want to merge to make one image. Images must have at least a 40 percent overlap so the program can properly match them. If you’re lucky enough to have a photographer on staff, he or she probably knows exactly what to do. If you’re like me and have to do it yourself, here are a few tips on taking pictures for a panorama:
- Decide what you want to include in your panorama before you start shooting.
- Take pictures in order; it’s easier to determine how much to overlap you need if you plan ahead.
- Stand in one place and try to keep your camera as level as possible, or use a tripod.
- Don’t take a lot of time between shots.
Step 2:
There are two ways to access the Photomerge tool, directly through Photoshop (File>Automate>Photomerge) or using Bridge. I opt for bridge so I can see my options. In Bridge, select your images and go to Tools>Photoshop>Photomerge.
The Photomerge box will then pop up in Photoshop with options. Most of the time the Auto Layout option works really well, but if you get a funky result, start the process over again and choose a different option. You can read the official explanation of each option in Photoshop Help.

Once you’ve decided on a layout option – hit OK.
Photoshop will then process your photos. The time it takes depends on how many photos you are merging and the speed of your computer. Be patient! Once it is finished merging you will have one file that resembles:

TADA! Panorama. Now to edit
Step 3:
Panoramas don’t come out in pretty rectangles, so we have to do a bit of editing. Some require more editing than others based on the layout type. A simple edit would be to crop the image using only the live space – nothing else needed.

If you need more of the image or want a wider/taller view a bit more work is needed. For example, the image below has some empty canvas that needs to be filled before it’s usable.

You can always use the clone stamp tool to fill in the blanks, but if you are using CS5 there is a more powerful tool in your arsenal – the Content-Aware Fill. Take your Lasso tool and circle one area that needs filled (be sure to merge the layers first). When selected, go to Edit>Fill and choose Content-Aware. The Content-Aware fill will look at the information around the area you have selected and make a smart decision as to what needs to go there. It isn’t always perfect, but it is pretty amazing!

And that’s it! Once you are happy with your panorama, simply resize as normal, save for Web and you are ready to add it to your site!
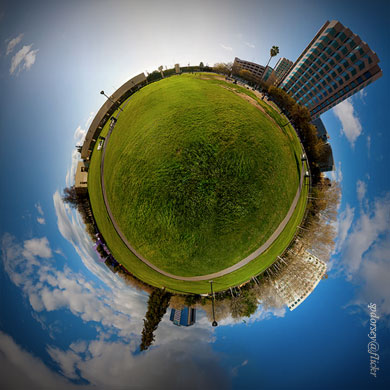
Slideshow and thumbnail image courtesy of spdorsey@flickr.